Introduction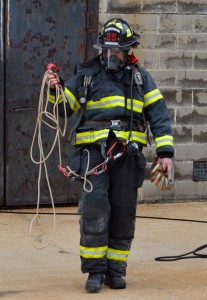
The process of choosing a bailout system for your agency can be difficult to say the least. In this article, I am going to share with you my step-by-step guide to ensure you are able to accurately evaluate your agency needs, and choose the best possible system for your situation.
There are many things to consider when making these choices, and I have found the best method is to complete a full evaluation of your needs first, and then begin to choose equipment that you will demo based on your evaluation of needs.
Before we get into the actual process of choosing your bailout system you understand that you will have the option to choose equipment that has been packaged together from a single vendor, or purchase individual components and build your own system. Some will say that you are required to purchase a system as one piece for it to be approved for use. Often times these all-in-one kits are tested together as one kit, but this does not mean they are the only viable option.
Think of your current rescue gear, I am sure that it was not purchased as a complete stand along system. You most likely purchased individual certified parts that can be used as part of a system to complete a rope rescue evolution. It is the responsibility of the (AHJ) Authority Having Jurisdiction to ensure these items are used per manufacturer recommendations at all times. This same line of thinking is true when considering bailout equipment systems that are made of individual certified components. The ability to build your own system from certified parts is often a good option, and you may also be able to ask a manufacturer to swap out certain components to customize the kit to best meet your needs.
 Click to Enlarge
Step 1 – Evaluate the Harness Situation
As you begin to evaluate the needs of your agency, the first step is to determine how you will attach the bailout equipment to each firefighter. You have two main choices here, a class II harness, or a gut belt. The single gut belt that goes around the waist will be less expensive, but much less comfortable to use and train in. The class II harness is more comfortable, more versatile, but also more expensive, and difficult to attach to their gear. When purchasing a harness, or gut belt you should choose one of the commercially available and certified options on the market today.
I recommend the first step in this process be to meet with your current turnout gear provider to see what type of internal or external harness they are offering in your brand of turnout gear. You will then want to evaluate all current gear, as well as new gear that will be purchased moving forward. A few questions to ask specifically are listed below regarding harnesses in the turnout gear.
- Is any new gear you will be purchasing equipped with an internal harness, an externalharness, or nothing at all?
- Can existing gear with service life left be cost effectively retro fitted with the same harness that new gear will have to provide future consistency between all gear?
- Are the harnesses one size fits most, or will they need to be custom fitted to each member?
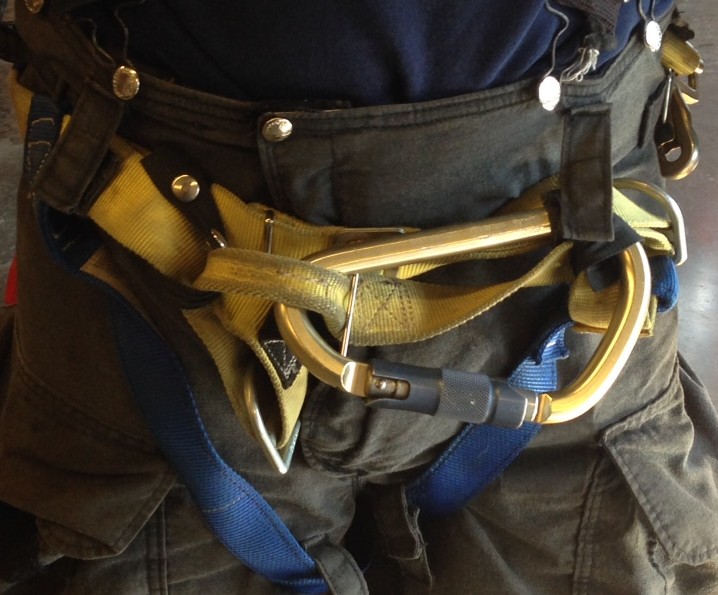
- Is a large Carabiner included with the harness to be used for victim lowers, fall restraint, and as a ladder belt?
 Click to Enlarge
I recently assisted a department that had 50% older gear with a significant amount of service life left in it, and 50%recently purchased gear. None of this gear had any kind of built in or external harness purchased with it. When we looked at the future purchases that would be made, it was apparent that an internal class II harness would be standard issue moving forward for all new gear purchased from the manufacturer. The question was how do we provide an option for members until they are due to receive the new gear? Furthermore, we had to have an option that would provide them a harness when their frontline gear was being washed, or was out of service. The decision was made to retrofit all current serviceable gear with a 3rd party class II harness that could be held on with the addition of small velcro tabs around the waist and legs. This required a cost of approximately $100.00 per set of gear to have the tabs installed, and a cost of approximately $225.00 per harness to purchase the external harness with a large 3 stage carbiner attached to the front. This would allow for flexibility to move one harness between multiple sets of turnout gear as members transitioned into the new gear with the internal harness. This type of evaluation and decision making may seem trivial to some, but the harness wear ability, functionality and cost are all key elements that must be considered and finalized before any part of the process can move forward.
Step 2 – Individual Issue or Per Seat
The next important question to ask is do you want to have a bailout system for each position on the apparatus, or do you want each firefighter to have their own kit? This decision is one that is often debated as it can have a huge effect on total cost of the project. I will list several of the benefits for each type of system and you can evaluate based on your specific agency and make the best decision that fits your needs. When looking at the riding position option, it is quickly apparent that there will be much lest cost since members are essentially sharing kits. This can be a viable option, but I have to say most firefighters I have worked with would rather have their own equipment so they know where it has been, and how it has been taken care of. That is not to say either option is the only way to go, consider the other items that we share everyday on the apparatus between shift members such as nozzles, flashlights, SCBA’s & hand tools. For me one of the biggest concerns of sharing a systems is the inability of the firefighter to be ready to bailout at all times. Think back to all the times you see firefighters walking around with SCBA waist straps dangling down at their sides. In a similar way, if the bailout kit is hanging on the SCBA it will be incumbent on the firefighter to connect the system to their harness before arriving at every call so they will be prepared to bailout should the need arise. In the case of a personal bailout kit that is carried by each firefighter, the kit will remain connected to the harness at all times, and will limit the possibility for user error. This logistical decision will ultimately come down to an organizational decision based on many factors, but I would recommend you keep firefighter safety as high on that list as you can during this specific decision making process.
Step 3 – Choosing a device
 Click to Enlarge
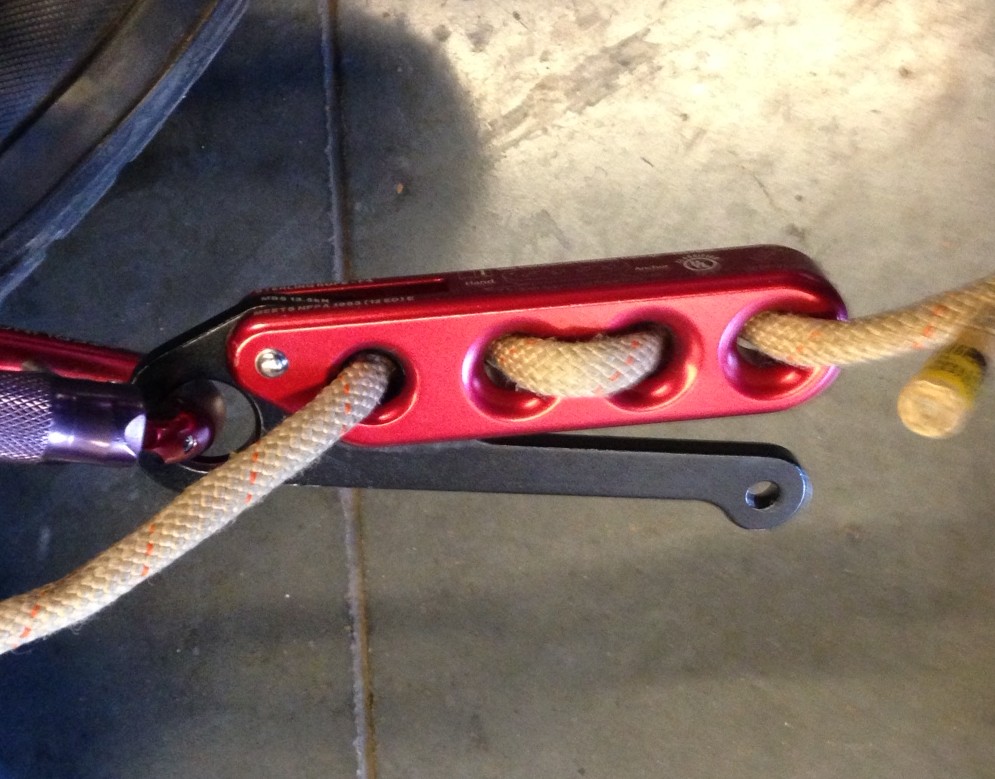
When choosing the actual descent control device for the system, you must consider the obvious issues of size, weight & cost. However, the most important issue is to decide if you will have a positive locking device. A positive locking device means that when you place a load on the system the device will lock off and not allow any movement down the rope until it is activated by the user. So when you look back to early options for descent control we were using carabiner wraps, munter hitches or the infamous body wrap. These devices and methods served the purpose prior to specific locking bailout devices being designed, but they did so at much higher risk to the user. I am sure you can imagine what would happen if upon going out of the window, you lost your grip or control of the rope. During the high stress event of bailout from an elevated window, the more we can reduce the potential for user error the better. Choosing a decent device will involve evaluating the fit, function, & cost of the device, but safety factor must be the guiding element if at all possible.
Step 4 – Do I Need a Hook?
 Click to Enlarge
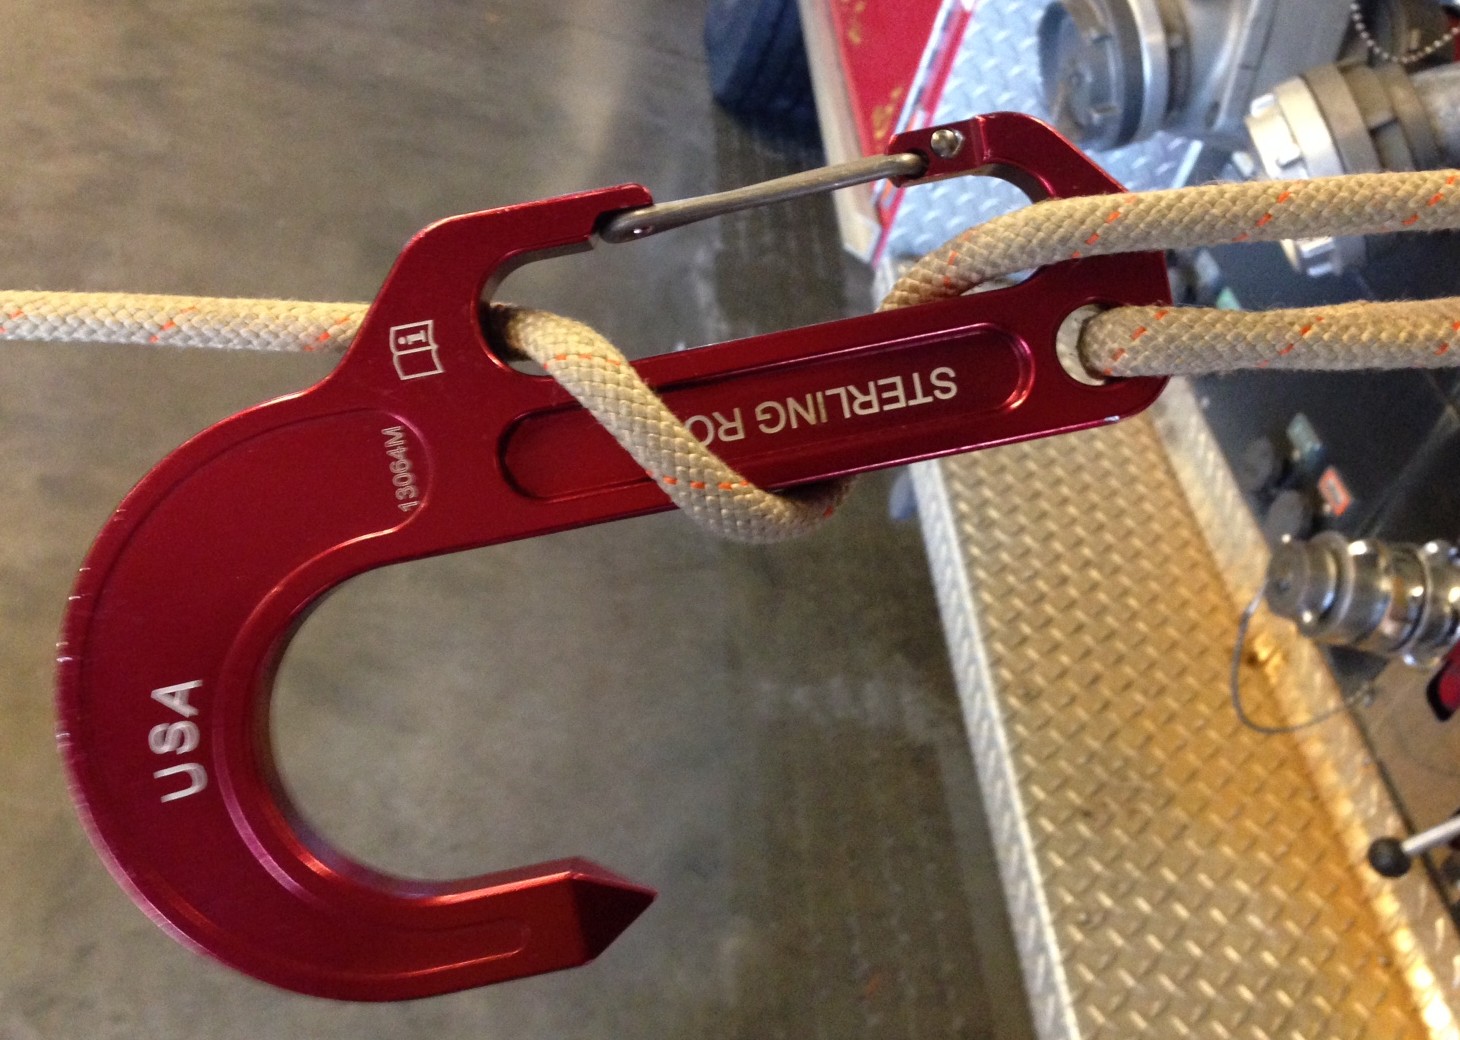
When building your system there are two distinct schools of thought with regard to what is on the end of your rope, you could use a pre built hook, or a knot with some type of carabiner connected to it. Before I offer my opinion on this I will explain the thinking behind each system. When exiting an elevated window there are several potential anchor points that could be available to the firefighter to choose from depending on the severity of conditions.
- Remote Anchor – A substantial item located in the room that the system can be tied off to.
- Tool Near Window – Use of an axe, halligan, or hook to anchor the system to, and then position in or near the corner of the window to create a secure anchor.
- Hook on Window Sill – A manufactured and rated hook that is part of the system, and can be anchored at the point of egress very quickly during the transition out of the window.
There are significant pros and cons to each of these systems depending on the situation at hand. For example, in poor visibility tying knots and working a carabiner can be very challenging even with substantial practice. The inability to access remote anchors could leave fewer available options for either of these systems, and the need to remain at the point of egress due to high heat might leave the firefighter with only the window anchoring option to choose from. After teaching these skills to many firefighters, and speaking with those who have been forced to bailout under fire conditions both with, and without a rope, my choice and recommendation is quite clear. The hook system provides the best overall possibility for a successful anchor point, and thereby a successful bailout under even the worst of conditions. As for they type of hook, I will leave that to you, but I recommend that you contact as many vendors as possible, and look at or demo several of these system components so you can make a responsible decisions based on fact, and not just personal opinion or hearsay.
Step 5 – Rope Choice
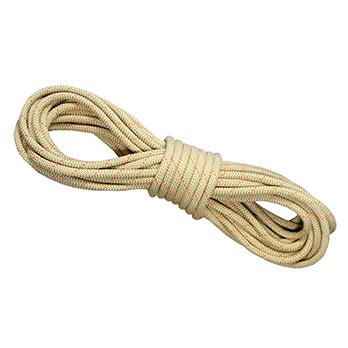 Click to Enlarge
When making a rope choice you will consider durability, abrasion resistance, pack ability, and cost. You should again, look at the process in steps as I have set out in this article. As an example, it is easier to choose a rope once you have your PPE, harness, and descent device set. In the case of rope choice, I also recommend that you look ahead to step 6 where I discuss rope bags or pockets that will store the rope and equipment on your gear, and consider steps 5 & 6 as one. This will allow you to then evaluate other related questions such as pack ability of the system, comfort, durability. It is also a good idea to contact other departments that have been using the equipment you might be considering in case they have any information that could help your decision making process based on their experience using the equipment. When deciding on rope length, the most common lengths are 40 & 50 foot sections, and personally I opt for the 50 foot section in case I have to do a remote anchor which will use up some of my rope length traversing the room. You will also be faced with the decision of rope construction. There are many choices such as nylon, kevlar, and several blends that contain multiple materials. This is again a choice that is best made by actually using the rope in bailout training situations and choosing what you feel is best when considering all factors. I personally feel that nylon rope gives to little abrasion resistance, and full kevlar ropes are often too rigid and stiff to easily carry. In almost every case I would recommend some type of kevlar blend rope designe specifically for firefighter escape.
Step 6 – Bag or Pocket
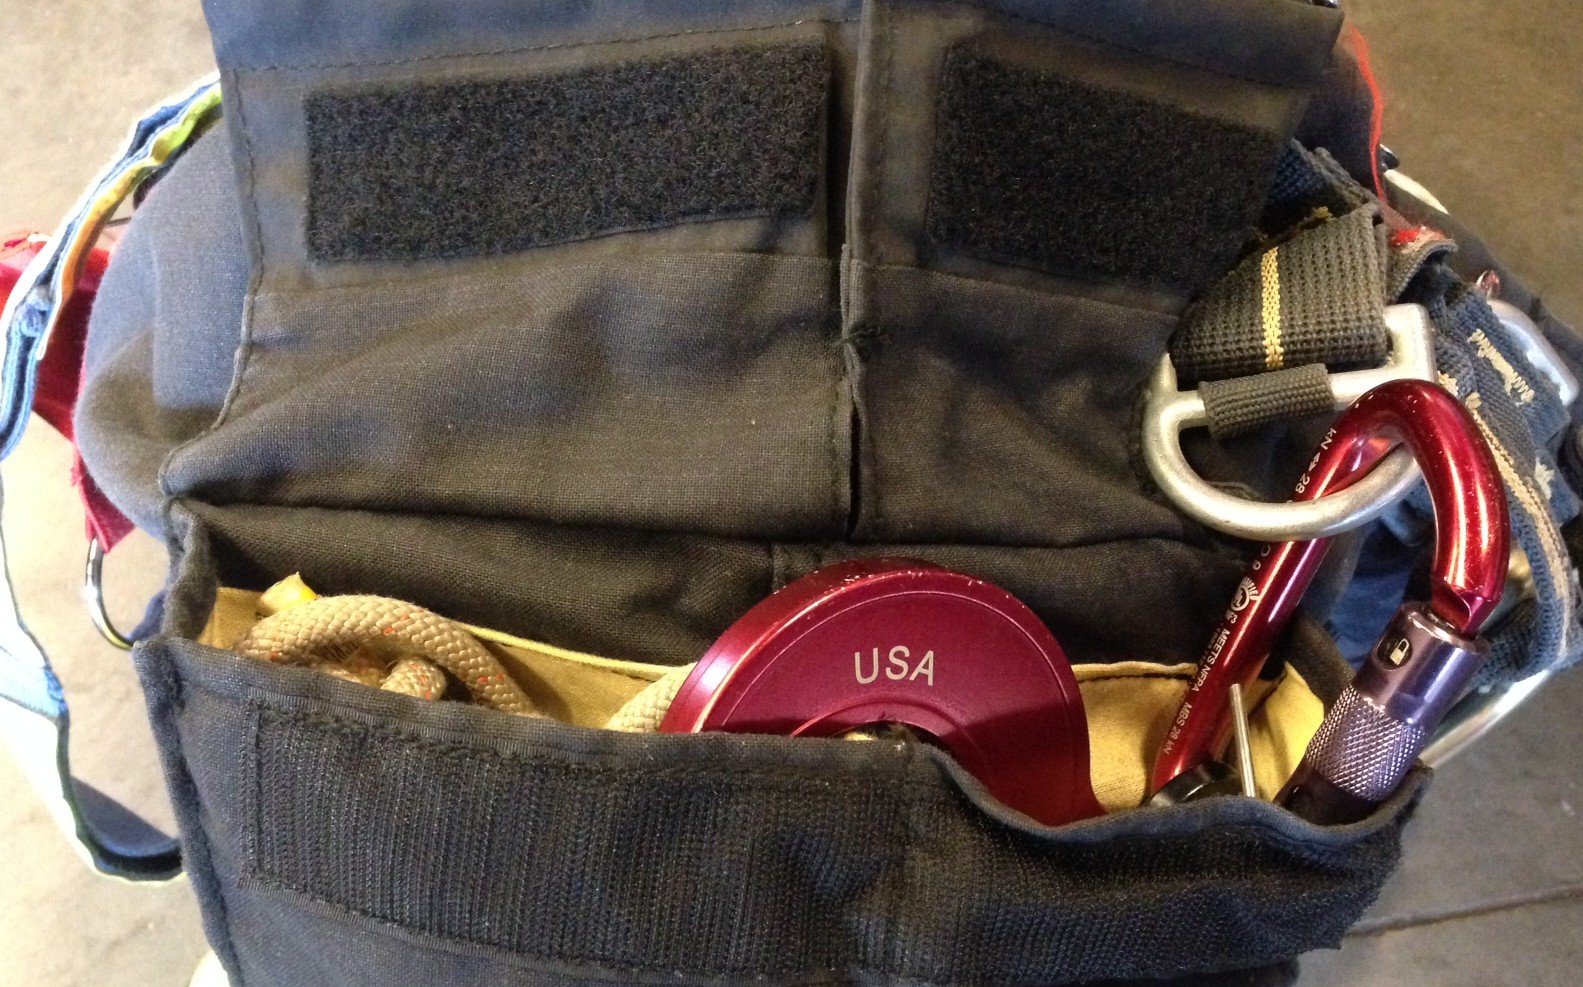 Click to Enlarge
As mentioned in step 5 you should be considering your rope and storage bag together so you can ensure proper fit and protection for your system components. Your rope bag decision will be very much dependent on what type of system you are going to deploy. If you are going to have the system in each firefighters turnout pocket, then a custom pocket could be designed for easy deployment. If they will be wearing an external bag on their harness, or will they hang the bag on the SCBA harness as discussed earlier where each member does not have their own personal kit. When looking at the kits you should consider if you would like side mounted bag, or a lumbar bag that gives a bit of a narrower profile, but is sometimes uncomfortable when riding in the apparatus. The choice of a bag or pocket is a difficult choice that must be evaluated in detail, with members wearing the kits in the proposed way to properly make an informed decision. I have seen departments make this decision based only on a conversation, or after a brief look at a picture, and often times have been unhappy with the final result once it was put into practice. As trivial as bag type may seem at this point, trust me when I tell you it deserves your full attention and planning.
Step 7 – Training
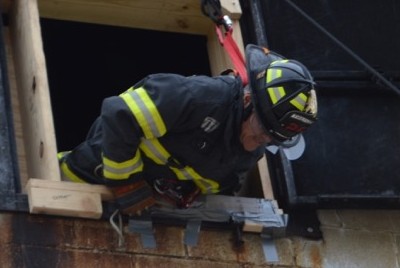 Click to Enlarge
Upon purchasing your systems, you will need to have training on all aspects of the equipment. You have many choices when it comes to bailout training. You should look for a training company that has been recognized by the device manufacturer as being a recommended trainer on their specific device. You can do an in house training provided by a third party approved training company that is classroom style, with hands on for every member, or in some cases there is ability to use the train-the-trainer method to help reduce cost. However, my personal opinion is you should definitely choose a recognized training company for your initial training, and consider a train-the-trainer model for future continuing education training. During your decision making process, you may want to attend open trainings where equipment is provided during the class, which will provide you guided hands on practice with various types of equipment. Finally, you may want to consider training kits with your equipment purchase which will allow your members to train with the training kits multiple times when safety lines will be in place, and maintain integrity of their personal kits for actual use.
Conclusion
The process of choosing a bailout system can at first glance appear very daunting. If you follow these simple but detailed steps, you will be able to make an informed decision and choose the equipment and system that is best for your specific agency. The ability of your members to be actively involved in this process will help them understand the many benefits these systems have to offer, and will encourage compliance and support for this equipment as a vital part of your firefighters personal protective equipment.
If you have any questions, please post them in the comments below and we will do everything we can to make sure you get the answers you need as quickly as possible. I would love to hear what equipment you are using, and any thoughts and opinions you might have that will help others who are looking to make a bailout equipment purchase.

You need to be a member of Fire Engineering Training Community to add comments!
Join Fire Engineering Training Community